글 쓰는 배경
이용자를 Desktop GUI와 Terminal UI에서 생성하는 법을 메모해 놓기 위함입니다. Google Search를 이용하면 되나, 그 시간마저 줄이기 위해서 입니다. 특히 adduser를 이용해 같은 group GID를 설정하는 것을 정리하기 위해서입니다.
목차
1. Desktop GUI에서 추가하기
2. Terminal UI에서 추가하기
3. 동일한 group GID로 이용자 생성하기
4. sudo 권한 부여하기
1. Desktop GUI에서 일반 사용자 추가하기
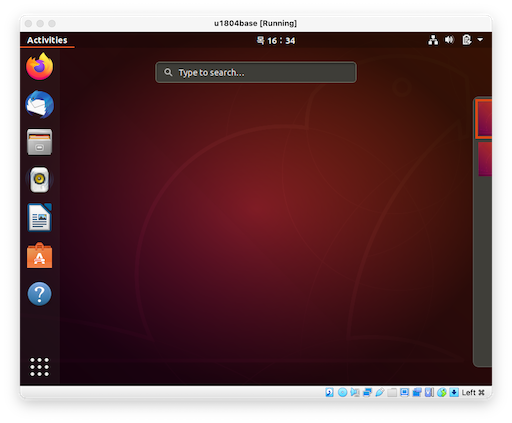
Desktop의 상단 좌측에서 Activities를 클릭합니다.

"user"를 입력하고 결과에서 "Users"를 선택합니다.

우측 상단에 "Unlock"을 선택합니다.

잠금을 해제하기 위해 관리자의 비밀번호를 입력합니다.

우측 상단에 보면 "Add User" 버튼이 생긴 것을 볼 수 있습니다. "Add User"를 선택합니다.

Add User에서 Standard/일반이용자와 Administrator/관리자를 추가할 수 있는 것을 알 수 있습니다.


Standard/일반이용자를 선택하고 username과 password를 설정합니다.

이용자 목록에 이용자가 추가된 것을 확인할 수 있습니다.

Terminal에서 추가한 사용자를 다음과 같이 확인할 수 있습니다.
salsal@host1:~$ tail -1 /etc/passwd
chanchan:x:1001:1001:chanchan,,,:/home/chanchan:/bin/bash
Desktop GUI에서 다른 사용자 1개를 더 추가하고 Terminal에서 확인해 보면, 새로운 uid (User ID), gid (Group ID)로 생성된 것을 확인할 수 있습니다. 만약 gid를 이미 있는 것을 부여하고자 한다면 Desktop GUI에서는 어렵고, Terminal 에서 해야하는 것을 추정할 수 있습니다.
2. Terminal UI에서 일반 사용자 추가하기
Desktop의 상단 좌측에서 Activities를 클릭합니다.
키보드에서 Term을 입력하고 Terminal을 선택합니다.

아래와 같은 shell prompt를 만납니다.

이제부터는 Shell prompt에서 command log 및 output을 공유합니다.
현재 사용자 목록을 보는 방법은 여러가지가 있습니다만 직접 파일을 확인하는 것이 빠릅니다.
salsal@host1:~$ less /etc/passwd
salsal@host1:~$ tail -5 /etc/passwd
salsal:x:1000:1000:salsal,,,:/home/salsal:/bin/bash
vboxadd:x:999:1::/var/run/vboxadd:/bin/false
sshd:x:122:65534::/run/sshd:/usr/sbin/nologin
chanchan:x:1001:1001:chanchan,,,:/home/chanchan:/bin/bash
salchan:x:1002:1002:salchan,,,:/home/salchan:/bin/bash
그러나 getent, compgen 등 다른 명령어도 있습니다.
salsal@host1:~$ compgen -u | tail -5
salsal
vboxadd
sshd
chanchan
salchan
salsal@host1:~$ getent passwd | tail -5
salsal:x:1000:1000:salsal,,,:/home/salsal:/bin/bash
vboxadd:x:999:1::/var/run/vboxadd:/bin/false
sshd:x:122:65534::/run/sshd:/usr/sbin/nologin
chanchan:x:1001:1001:chanchan,,,:/home/chanchan:/bin/bash
salchan:x:1002:1002:salchan,,,:/home/salchan:/bin/bash
이용자를 추가하는 명령어는 adduser와 useradd가 있습니다. adduser는 perl script이며 useradd를 이용합니다. adduser가 좀 더 사용하기 편리합니다.
salsal@host1:~$ which useradd
/usr/sbin/useradd
salsal@host1:~$ which adduser
/usr/sbin/adduser
salsal@host1:~$ head -1 /usr/sbin/adduser
#!/usr/bin/perl
salsal@host1:~$ head -1 /usr/sbin/useradd
ELF>�|@ �@8 @
@@@��888
���� 0�0�!0�!�4�? ����!�
adduser에 대한 man을 확인해 보면 다양한 option을 볼 수 있습니다.
salsal@host1:~$ man adduser | cat
ADDUSER(8)                 System Manager's Manual                 ADDUSER(8)

NAME
       adduser, addgroup - add a user or group to the system

SYNOPSIS
       adduser  [options]  [--home  DIR]  [--shell  SHELL] [--no-create-home]
       [--uid ID] [--firstuid ID] [--lastuid ID] [--ingroup GROUP | --gid ID]
       [--disabled-password]      [--disabled-login]      [--gecos     GECOS]
       [--add_extra_groups] [--encrypt-home] user

       adduser --system [options] [--home DIR] [--shell SHELL]  [--no-create-
       home]  [--uid  ID] [--group | --ingroup GROUP | --gid ID] [--disabled-
       password] [--disabled-login] [--gecos GECOS] user

       addgroup [options] [--gid ID] group

       addgroup --system [options] [--gid ID] group

       adduser [options] user group
adduser로 chris를 추가해 봅니다.
salsal@host1:~$ tail -5 /etc/passwd
salsal:x:1000:1000:salsal,,,:/home/salsal:/bin/bash
vboxadd:x:999:1::/var/run/vboxadd:/bin/false
sshd:x:122:65534::/run/sshd:/usr/sbin/nologin
chanchan:x:1001:1001:chanchan,,,:/home/chanchan:/bin/bash
salchan:x:1002:1002:salchan,,,:/home/salchan:/bin/bash
salsal@host1:~$ sudo adduser chris
[sudo] password for salsal:
Adding user `chris' ...
Adding new group `chris' (1003) ...
Adding new user `chris' (1003) with group `chris' ...
Creating home directory `/home/chris' ...
Copying files from `/etc/skel' ...
Enter new UNIX password:
Retype new UNIX password:
passwd: password updated successfully
Changing the user information for chris
Enter the new value, or press ENTER for the default
Full Name []: Chris Evans
Room Number []:
Work Phone []:
Home Phone []:
Other []:
Is the information correct? [Y/n]
/etc/passwd 파일을 확인하면 chris를 추가한 것을 알 수 있습니다.
salsal@host1:~$ tail -1 /etc/passwd
chris:x:1003:1003:Chris Evans,,,:/home/chris:/bin/bash
Desktop GUI에서 이용자를 추가하면 새로운 UID, GID를 가진 사용자를 생성하듯 adduser도 동일한 방법으로 생성합니다. group 정보를 보면 이용자마다 고유한 GID를 생성한 것을 알 수 있습니다.
salsal@host1:~$ tail -6 /etc/group
salsal:x:1000:
sambashare:x:126:salsal
vboxsf:x:999:
chanchan:x:1001:
salchan:x:1002:
chris:x:1003:
3. 동일한 group GID로 이용자 생성하기
이용자를 관리하다 보면 여러 명의 이용자에게 같은 GID를 설정해야 하는 경우가 있습니다. 따라서 다음은 color라고 하는 GID 1004를 만들고 그 안에 포함되는 이용자 red, green, blue를 생성하는 예입니다.
group 이름 color를 먼저 생성합니다. GID를 1003까지 이미 생성했으므로 그 다음 값 1004를 이용합니다.
salsal@host1:~$ sudo addgroup color
Adding group `color' (GID 1004) ...
Done.
adduser를 이용할 때 --ingroup color를 명시하여 GID 1004를 red에 설정합니다.
salsal@host1:~$ sudo adduser --ingroup color red
Adding user `red' ...
Adding new user `red' (1004) with group `color' ...
Creating home directory `/home/red' ...
Copying files from `/etc/skel' ...
Enter new UNIX password:
Retype new UNIX password:
passwd: password updated successfully
Changing the user information for red
Enter the new value, or press ENTER for the default
Full Name []: Red Color
Room Number []:
Work Phone []:
Home Phone []:
Other []:
Is the information correct? [Y/n]
이용자 red를 조회하면 UID는 1004, GID는 1004라는 것을 알 수 있습니다.
salsal@host1:~$ tail -1 /etc/passwd
red:x:1004:1004:Red Color,,,:/home/red:/bin/bash
동일한 방법으로 이용자 green, blue를 생성했고 그 결과를 아래와 같이 확인할 수 있습니다. 즉 모두 동일한 group "color" GID 1004를 가집니다.
salsal@host1:~$ tail -3 /etc/passwd
red:x:1004:1004:Red Color,,,:/home/red:/bin/bash
green:x:1005:1004:Green Color,,,:/home/green:/bin/bash
blue:x:1006:1004:Blue Color,,,:/home/blue:/bin/bash
4. sudo 권한 부여하기
sudo, su, su - 에 대해서는 아래 링크에 있는 글을 참고하면 됩니다.
- https://brownbears.tistory.com/227
sudo는 root가 아닌 이용자가 root에 준하는 권한으로 sudo 다음에 오는 명령어를 수행할 수 있는 명령어입니다. Linux 시스템에서 시스템 운영시 많이 사용하는 명령어입니다.
아래 예로 사용하는 이용자 salsal은 username salsal, UID 1000, groupname salsal, GID 1000입니다.
salsal@host1:~$ grep salsal /etc/passwd
salsal:x:1000:1000:salsal,,,:/home/salsal:/bin/bash
이용자 salsal은 sudo 명령어를 이용할 수 있습니다.
salsal@host1:~$ sudo cat /etc/sudoers | egrep -v "^#|^$"
Defaults env_reset
Defaults mail_badpass
Defaults secure_path="/usr/local/sbin:/usr/local/bin:/usr/sbin:/usr/bin:/sbin:/bin:/snap/bin"
root ALL=(ALL:ALL) ALL
%admin ALL=(ALL) ALL
%sudo ALL=(ALL:ALL) ALL
그 이유는 group sudo가 이용자 salsal을 포함하고 있기 때문입니다.
salsal@host1:~$ grep salsal /etc/group
sudo:x:27:salsal
반면 이용자 red는 sudo를 이용할 수 없습니다. 이유는 이용자 red는 sudoers file에 등록되어 있지 않기 때문입니다.
red@host1:~$ sudo cat /etc/sudoers
[sudo] password for red:
red is not in the sudoers file.  This incident will be reported.
red@host1:~$ id
uid=1004(red) gid=1004(color) groups=1004(color)
이용자 red가 sudo를 이용할 수 있게 하려면 다음과 같이 명령을 실행해 주면 됩니다. 이용자 red에 대해 group sudo에 추가하라는 것입니다.
salsal@host1:~$ sudo usermod -aG sudo red
group 파일을 확인하면 group sudo가 이용자 salsal과 red를 포함한 것을 알 수 있습니다.
salsal@host1:~$ sudo grep red /etc/group
sudo:x:27:salsal,red
그러면 이제 이용자 red도 아래와 같이 root만 볼 수 있는 파일 내용을 확인할 수 있습니다.
red@host1:~$ sudo cat /etc/sudoers | grep sudo | grep -v ^#
%sudo ALL=(ALL:ALL) ALL
'Ubuntu' 카테고리의 다른 글
| VirtualBox 안에서 Ubuntu interface 이름 알아내기 (1) | 2021.07.30 |
|---|---|
| Macbook, Ubuntu에서 network interface 확인 (0) | 2021.07.30 |
| 비밀번호 없이 ssh 로그인 하기 (0) | 2021.07.29 |
| Ubuntu 18.04에 Mysql 5.7.34 설치하기 (0) | 2021.07.28 |
| Macbook / Virtualbox에 Ubuntu 18.04 설치 (0) | 2021.07.28 |


